


This feature empowers your users to submit posts, and edit/delete posts. It supports the Custom Post Type, Custom Taxonomy, ACF Field, ACF Repeater, Jet Engine, Toolset, Pods, and MetaBox.
Create a “Submit Button” > Actions After Submit > Add “Submit Post”.
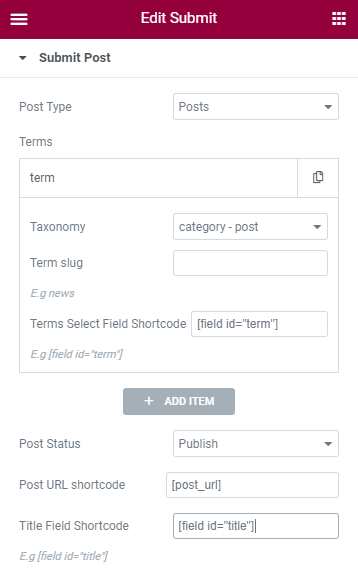
Edit the “Submit button” > Scroll to “Submit Post” Section.
PAFE Form Builder supports the Custom Post Type, Custom Taxonomy, ACF Field, ACF Repeater, Jet Engine, Toolset, Pods, MetaBox.
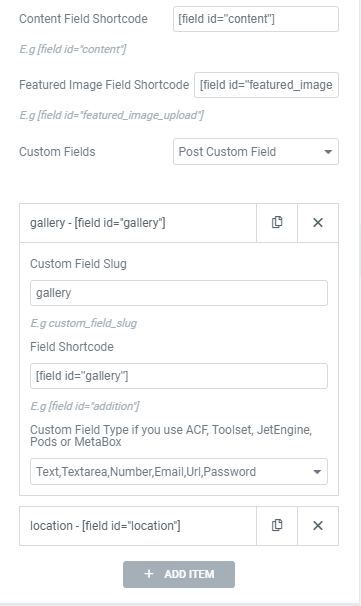
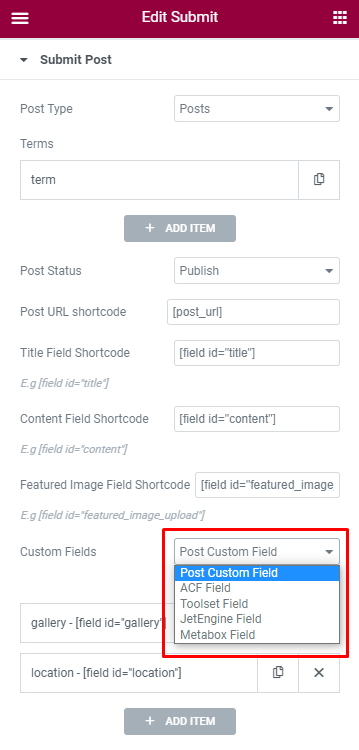
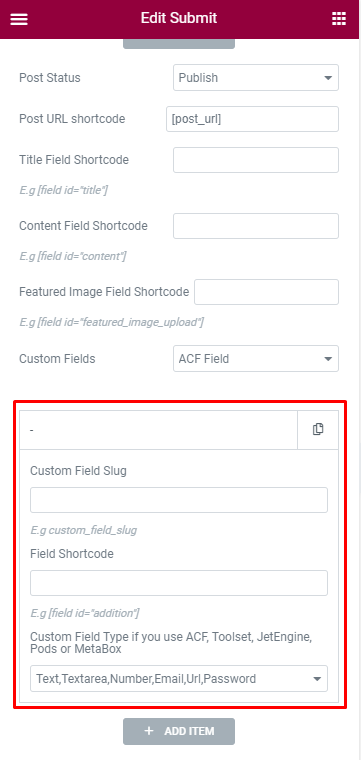
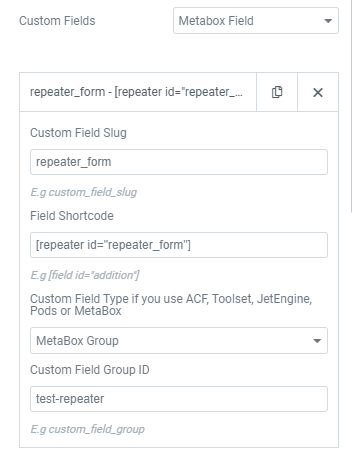
You can see the setting for Custom Field.
The custom field slug has to be the same as the field ID.
For example:
– The custom field slug is “test”. The field ID will be “test” and the field shortcode will be [field id=”test”]
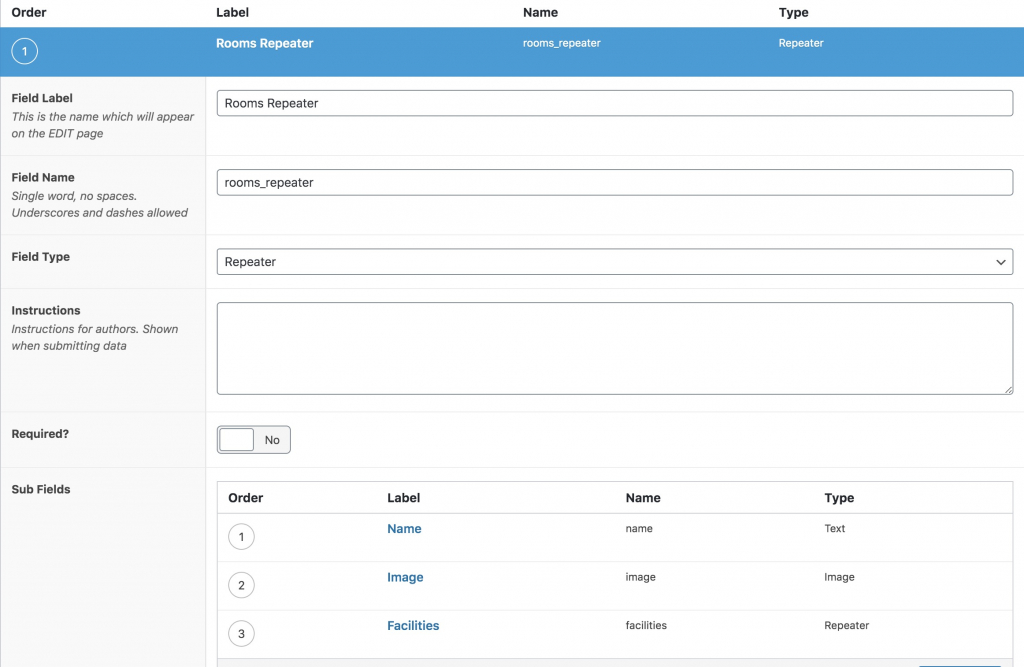
– Create some ACF Repeater Fields like the demo below.
– Create some JetEngine Repeater Fields like the demo below.
– Create Repeater Fields with Piotnet Addons For Elementor.
This is a tutorial on how to create repeater fields http://pafe.local/docs/repeater-fields-multi-level-nested/
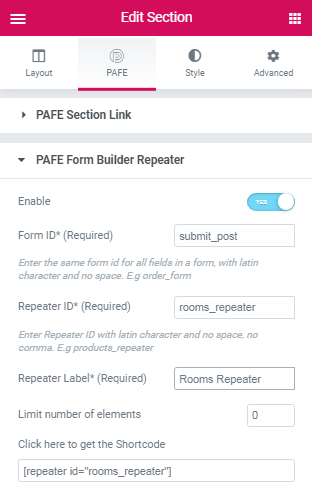
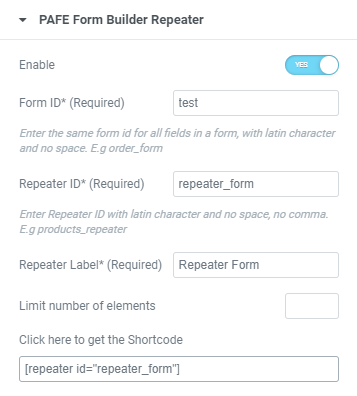
+ Create a Section > PAFE > PAFE Form Builder Repeater.
Notice: You have to enter the Repeater ID = Repeater Name in your ACF Field/JetEngine Field Setup.
+ Put Fields into that Section with the Field ID = Name of the Sub Fields, such as name, image.
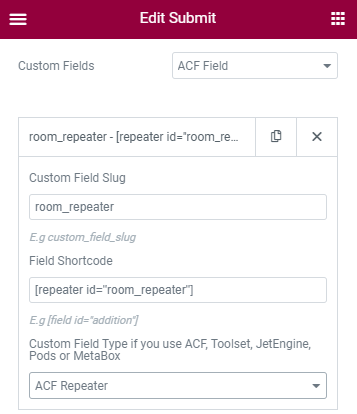
+ And then edit the Submit Button > Submit Post > Custom Fields.
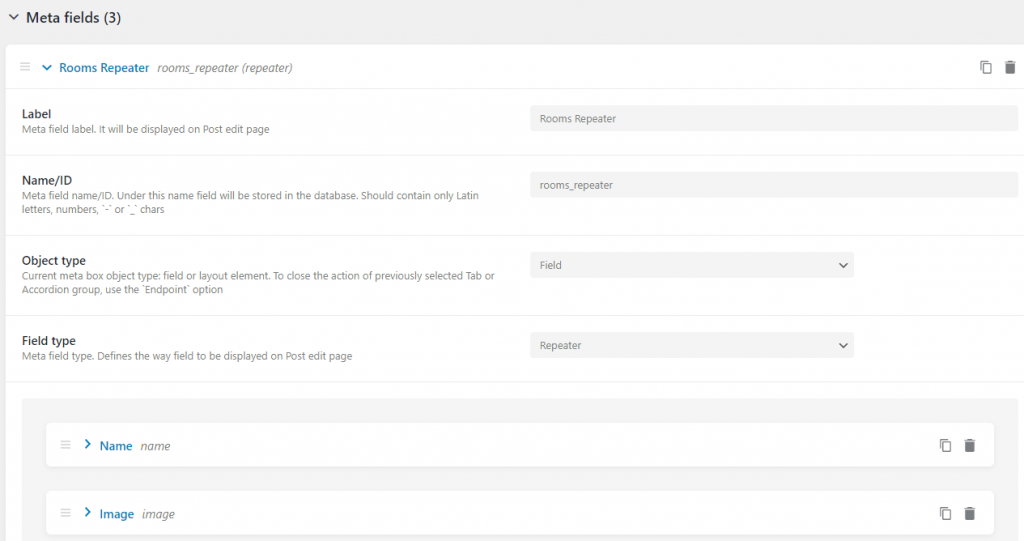
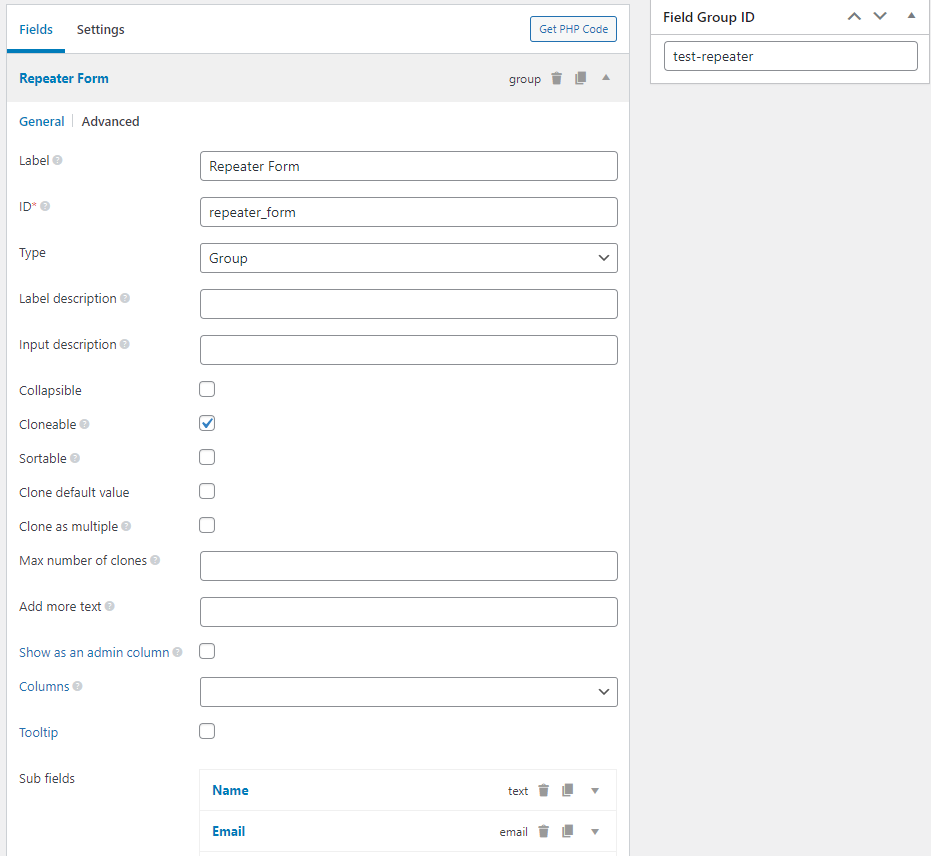
– Create MetaBox Group Fields like this example below.
– Create Repeater Fields with Piotnet Addons For Elementor.
This is a tutorial on how to create repeater fields http://pafe.local/docs/repeater-fields-multi-level-nested/
+ Create a Section > PAFE > PAFE Form Builder Repeater.
Note that: You have to enter the Repeater ID = Repeater Name in your MetaBox Field Setup.
+ Put some Fields into that Section with the Field ID = Name of the Sub Fields.
Notice: Avoid using common words, such as “image”, “date”, “time” for custom field slug.
+ And then edit the Submit button > Submit Post > Custom Fields
Add the Edit Post URL shortcode to your single template (Templates > Theme Builder).
The shortcode will be changed if you edit this form, so you have to refresh Elementor Editor Page and then copy the shortcode.
Replace “http://YOUR.piotnet.com/name-input/” with your Page URL containing your Submit Post Form.
Add the Delete Post URL shortcode to your single template (Templates > Theme Builder).
The shortcode will be changed if you edit this form, so you have to refresh Elementor Editor Page and then copy the shortcode.
Replace “http://YOUR-DOMAIN.piotnet.com” with your Page URL containing your Submit Post Form.
Replace sm=’p85459111′ and smpid=’233′ with the sm argument and smid argument in the Delete post shortcode.
<!--[delete_post force_delete='0' delete_text='Delete Post' redirect='http://YOUR-DOMAIN.piotnet.com' sm='p85459111' smpid='233'][/delete_post]-->
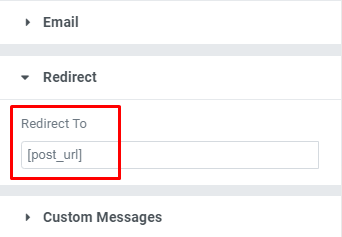
Please add Redirect feature from Actions After Submit and set Redirect URL = [post_url]
– Put the form into a Section.
– Edit Section > PAFE > PAFE Conditional Visibility.
Create an ACF Relationship Field
For instance:
<!--[pafe_get_posts post_type="post,page" value="test_relationship"]-->

also check your spam folder.
