Webhook Slack is an Action After Submit. This feature empowers you to create a form where your customers can send message directly to an assigned Slack channel.
This document is written on the assumption that you already know how to use Slack. Otherwise, please learn how to use Slack before continuing to perform the following steps to set up your Slack Integration.
Tutorials
Step 1: Register a Slack account.
Firstly you need to have a Slack account. Here is where you can register: https://slack.com/
This is the Slack account that you will use to receive customers’ messages.
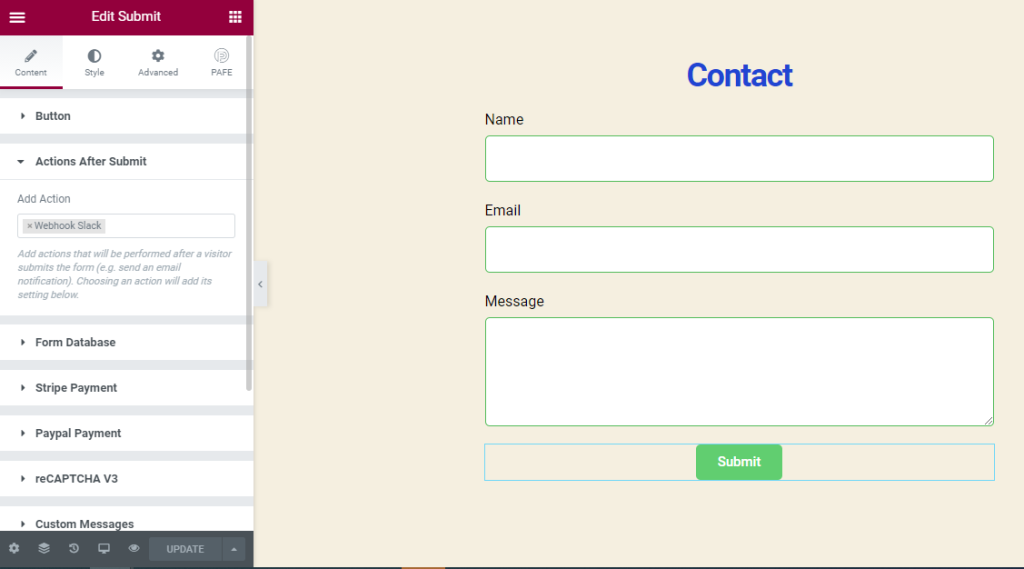
Step 2: Create a form to collect necessary information from your customers. The information from this form would be sent to the assigned Slack Channel.
Remember to add a Submit Button.
Step 3: Enable Webhook Slack.
Edit the Submit Button -> In Action After Submit, choose “Webhook Slack”.
Step 4:
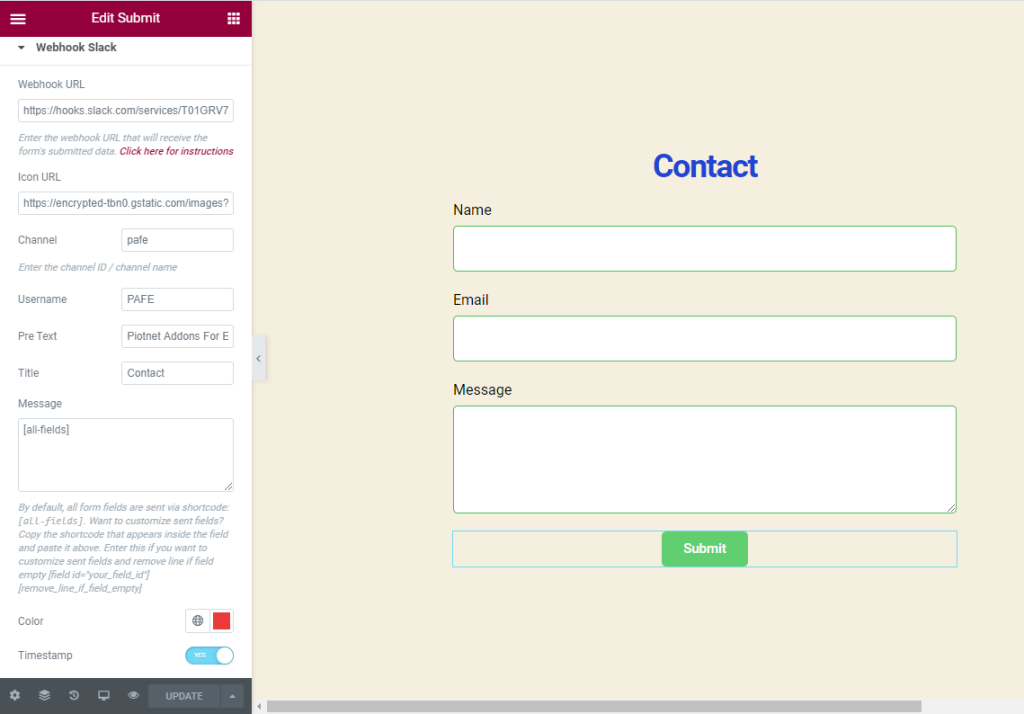
Open Webhook Slack Setting Panel.
After enabling Webhook Slack (Step 3), the Webhook Slack Setting Panel would appear on the action after submitting the list. Open it to continue setting up.
Step 5: Assigning Slack Account and Default Channel.
This is the step where you will assign the Slack account (from step 1) to receive customers’ messages. The default Slack Channel will also be added.
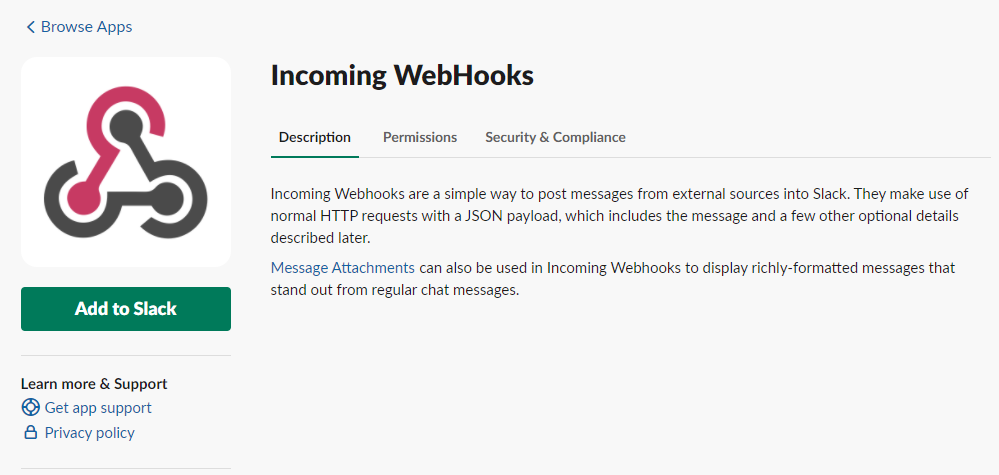
-> Install Incoming WebHooks and get the Webhook URL
- Go to https://slack.com/apps/A0F7XDUAZ-incoming-webhooks/
- Click on “Add to Slack“
- Select one of your existing channels or create a new one.
- Click “Add Incoming WebHooks integration”
- Now you will get the Webhook URL
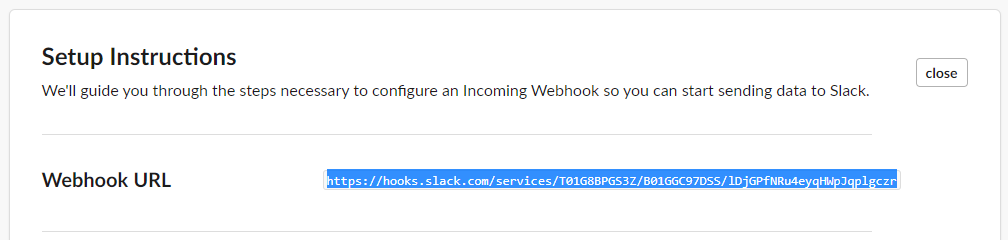
-> Put the generated Webhook URL into the Webhook URL field in Webhook Slack Setting Panel.
Step 6: Setup other relevant information.
- Icon URL – Set avatar for the sender. This avatar will represent all messages submitted from this form.
- Channel – Choose a channel on Slack to receive messages. If you let this field blank, the message would be sent to the default channel from Step 5.
- Username – Set a username that will be shown as the sender.
- Pre Text – Customize the text before the message.
- Title – Set the title of the sender.
- Message – Select contents which you want to receive from the form.
- Timestamp – Enable to receive actual submitted time.
- Color – Select the border color of the message.
Step 7: Test your Webhook Slack.
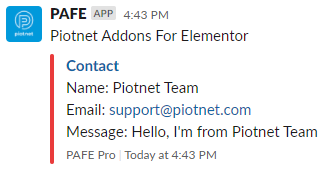
After completing step 6, you can test your Webhook Slack by submitting a message from the form. If everything is correct, you would receive a message in your Slack channel which is similar to the image above.