×
HIDE

MailPoet

MailPoet feature allows storing customers’ registration information for the purpose of using it in marketing campaigns. 

Tutorials

Step 1. Install the MailPoet plugin.
Step 2. Create a form to collect necessary information.

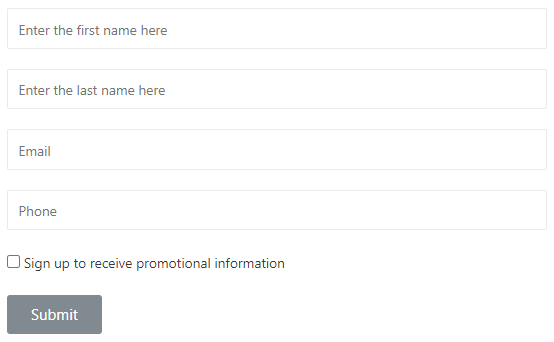
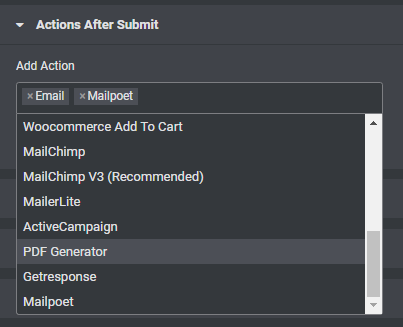
Step 3. Click submit button, select Action After Submit -> Add Action -> Mailpoet

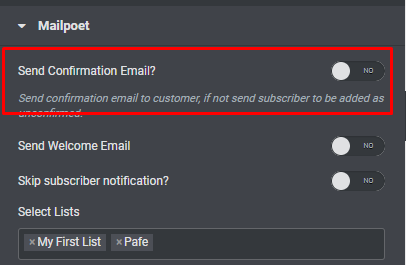
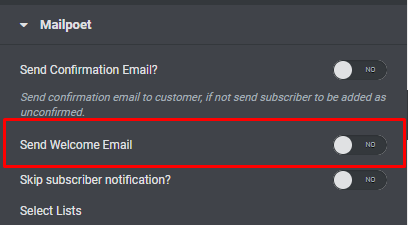
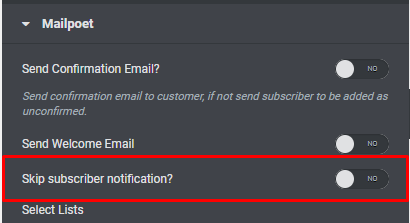
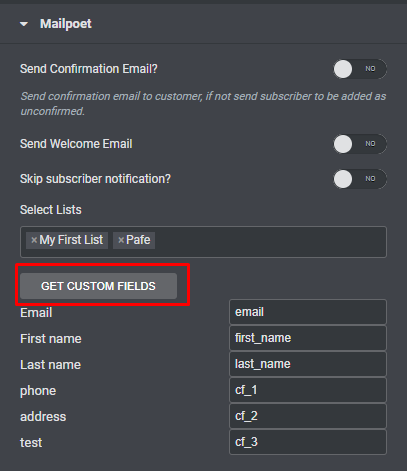
Step 4. In the Mailpoet section we have some options:

  • Send Confirmation Email:
    – If Yes, an email will be sent to customers for confirmation of registration. Then the customer registration information will be saved with the status as Subscribed.
    – If it is No, no email will be sent to the customer for confirmation. The customer information will then be saved as Unconfirmed. You can change the status in the admin page: MailPoet -> Subscribers.
  • Send Welcome Email: If yes, a welcome email will be sent to customers.
  • Skip subscriber notification: Skip notifications when members register.
  • Acceptance Field: uses conditions for users to agree to receive notification emails and save user information.

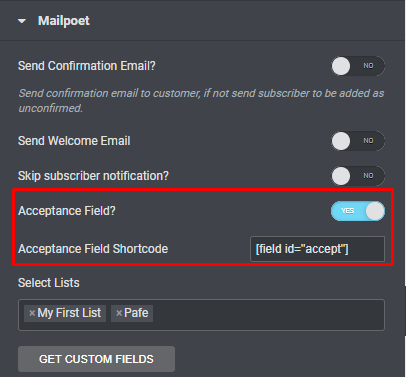
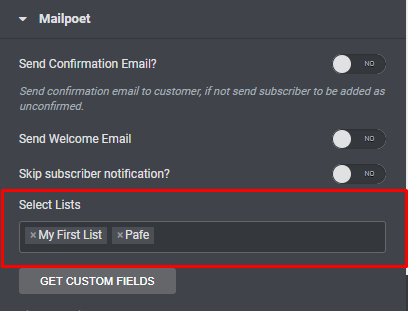
Step 5: Select lists: You can select the created lists to save member information.

Step 6: Click GET CUSTOM FIELDS to get a list of custom fields.

  • To create custom fields, you need to go to the admin page: MailPoet -> Forms -> Edit -> Click and add custom fields;

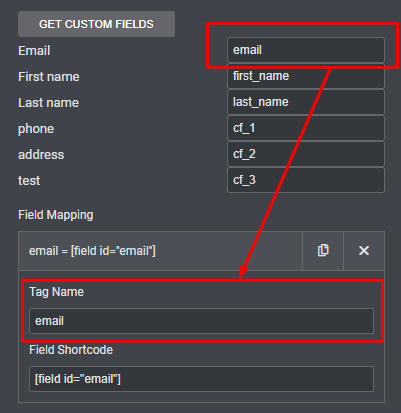
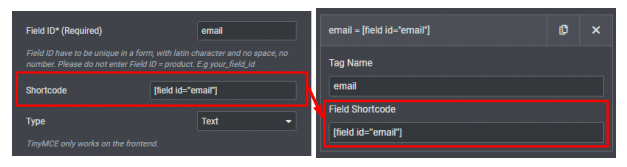
Step 7: After having the list of custom fields, make the Mapping field.

* Example (Field Email):
Tag Name: Copy custom field to field Tag Name

Shortcode: Copy field Shortcode to Field Shortcode (click field email get copy shortcode).

Step 8: Complete all the Field mapping and check the form operation.

Please check your email inbox. If you haven’t received anything,

also check your spam folder.

PAFE Form Builder

Extensions

PAFE Widgets

piotnet addons for elementor white icon
Popup Trigger URL
Piotnet Addons For Elementor