


We’ll demonstrate how you may simply connect Stripe Payment with WordPress, one such fantastic payment tool.
Webforms are now used for data collection that goes beyond the norm. They are being utilized for far more complex operations, such as online payments.
Why not, then? Today’s online forms are considerably more trustworthy and uncomplicated, offering customers straightforward options like payment summaries, payment methods, connection with payment tools, etc., so users can easily finish the entire payment or donation process.
Due to its user-friendly software and APIs, Stripe is a favorite among millions of businesses globally. It allows users to easily manage their online businesses, collect payments, and distribute payouts.
As a payment mechanism, it satisfies some of the most demanding needs of the users, including:
Below is a sample of Stripe Payment field when displayed in PAFE Form Builder.
There are several ways to integrate Stripe Payment with WordPress. You can accomplish it with any form builder that supports Stripe connection. To show how simple it is to combine Stripe with WordPress form builders, we will instead use PAFE Form Builder – one of Piotnet Plugins.
The quickest WordPress form builder, PAFE Form Builder, can assist you in quickly creating simple payment forms. Regardless of your level of coding expertise, you can quickly navigate through the interface.
In addition, you can create a Stripe Payment Form with Dynamic Pricing (Calculated Fields), Subscription Payment (Recurring Payment).
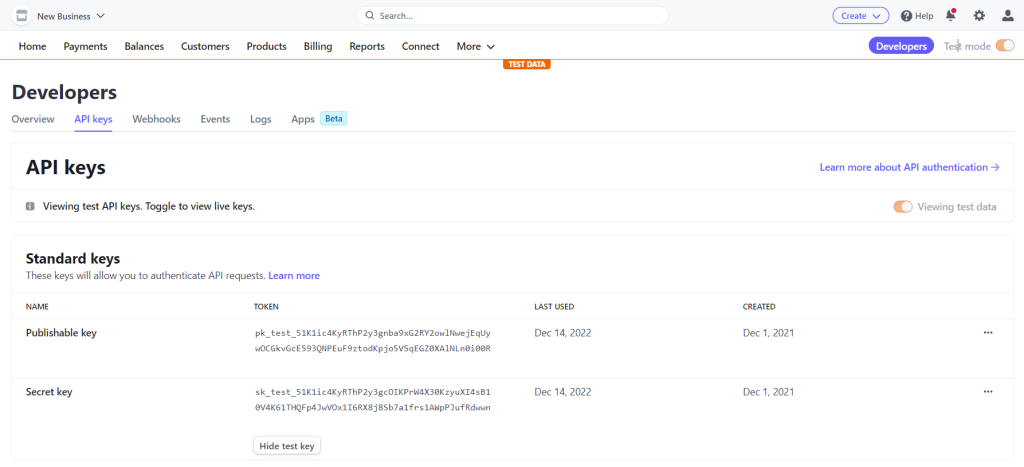
Access your Stripe Payment > API keys Category > copy both Publishable key and Secret key
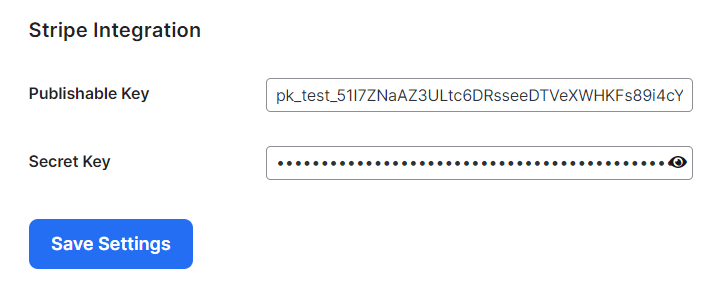
In the Website dashboard, go to PAFE > Settings > Integration > Stripe Payment
Fill out your Stripe keys.
You can just add the fields you want to a blank form. Using PAFE Form Builder, you can design a payment form in minutes by just dragging and dropping the one you need. You have to create a Field with type = Stripe Payment. Additionally, PAFE Form Builder includes mathematical calculations. So you can quickly create WordPress payment forms with calculations.
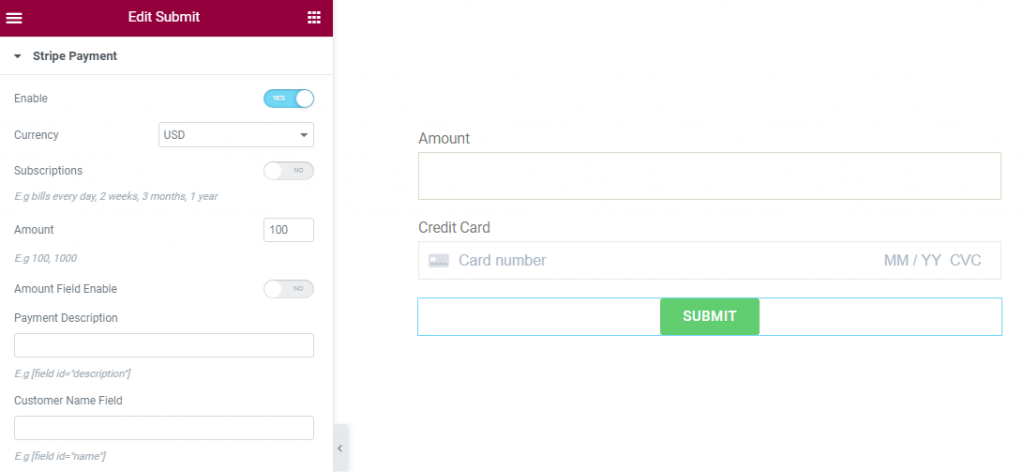
Afterwards, you need scroll to Stripe Payment Section > click “Enable” to make Stripe Payment work.
Here you have two flexible options:
You can enter fixed amount.
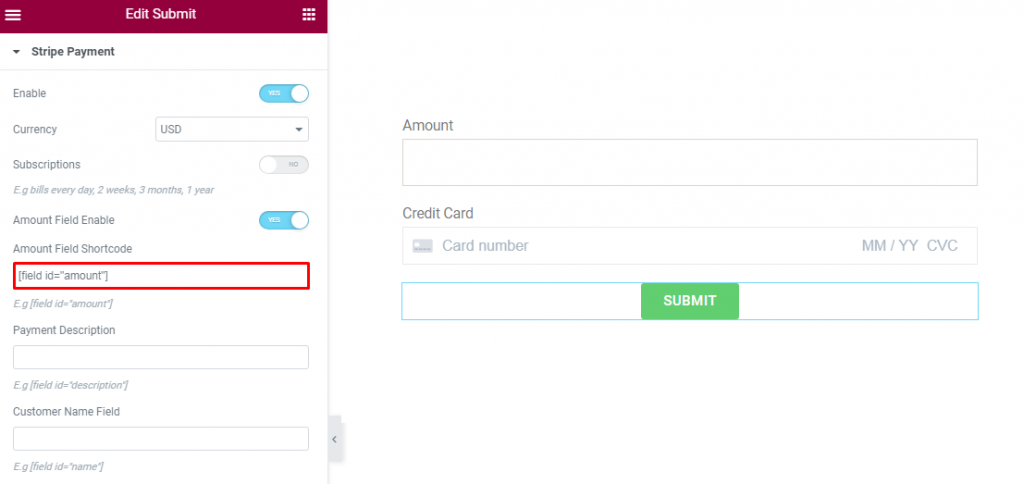
Or set Dynamic Amount with Amount Field (Number or Calculated Fields)
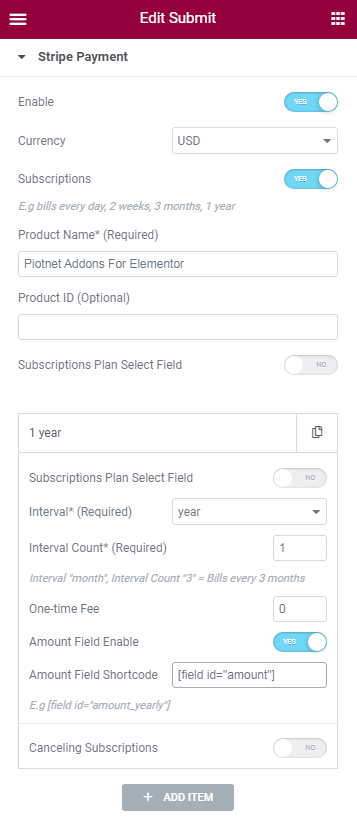
To set Subcription Payment (Recurring Payment), you can refer the following direction.
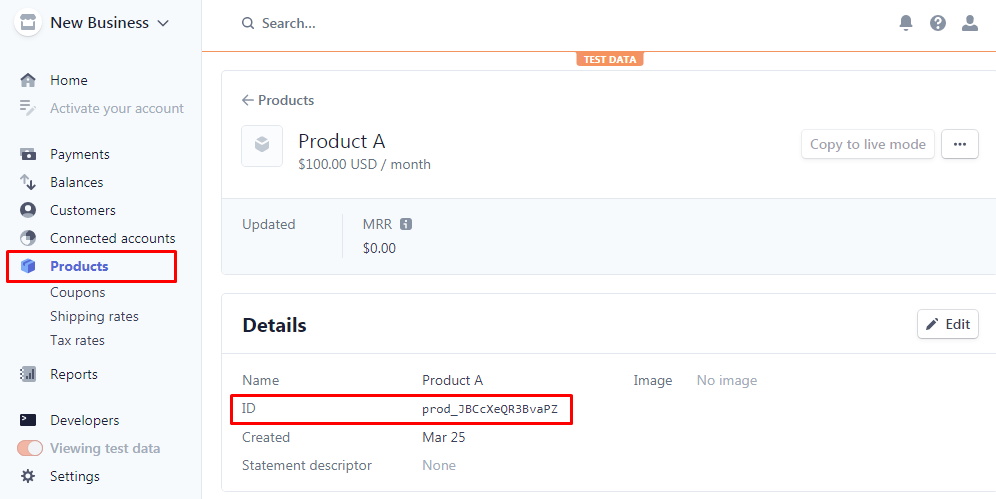
Get the Product ID in your Stripe Payment account.
Then click the Product > Details > get ID > add ID to Product ID box:
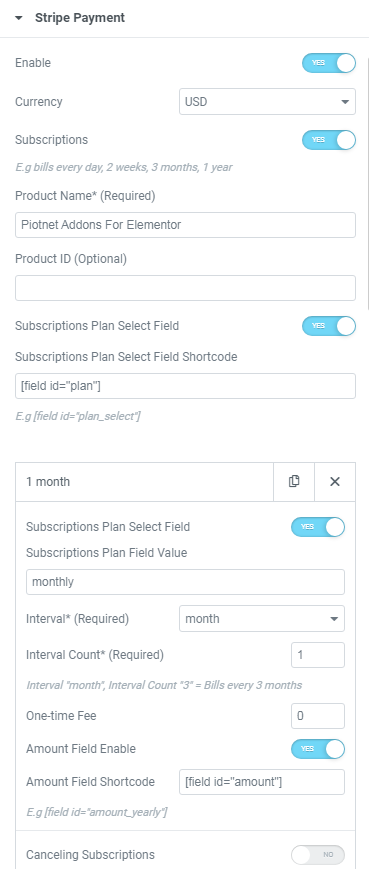
If you have multiple subscription plans and desire users to select an option, you have to create a Plan Field (Type field = Select) with options like this:
Monthly|monthly
Yearly|yearly
And then Edit “Submit Button”.
You can also trigger “cancel subscription”
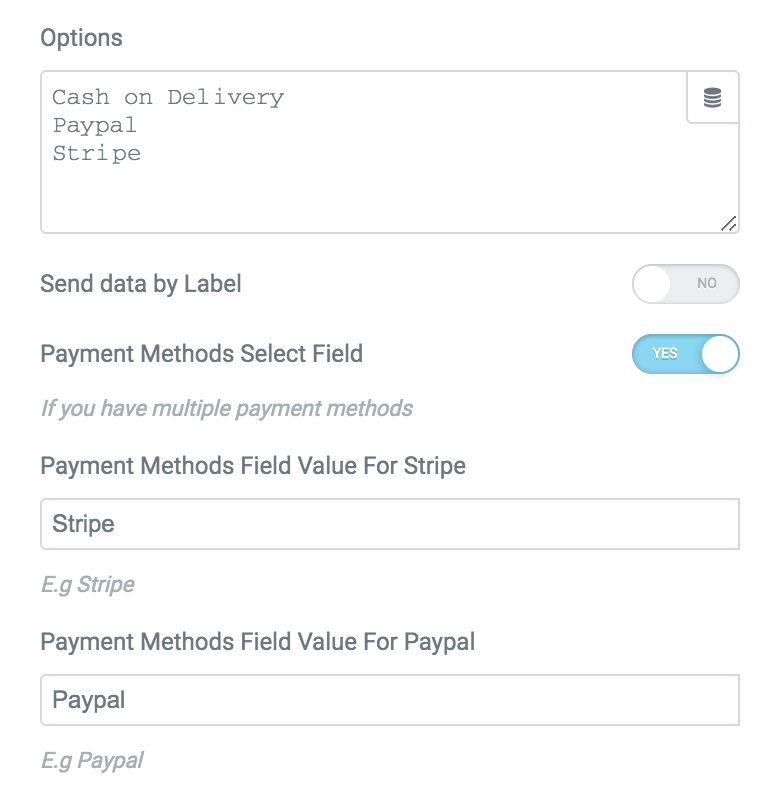
PAFE Form Builder also allow you to use multiple payment methods, you have to create a Payment Methods field (Select, Radio, Image Select) with options like this:
And then Enable Option “
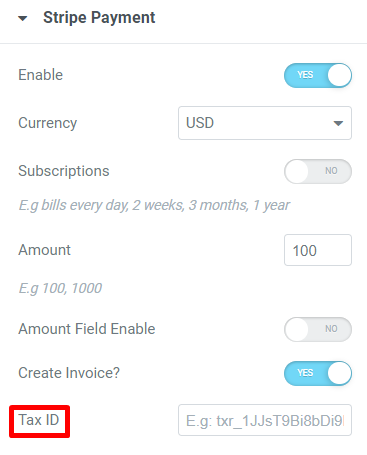
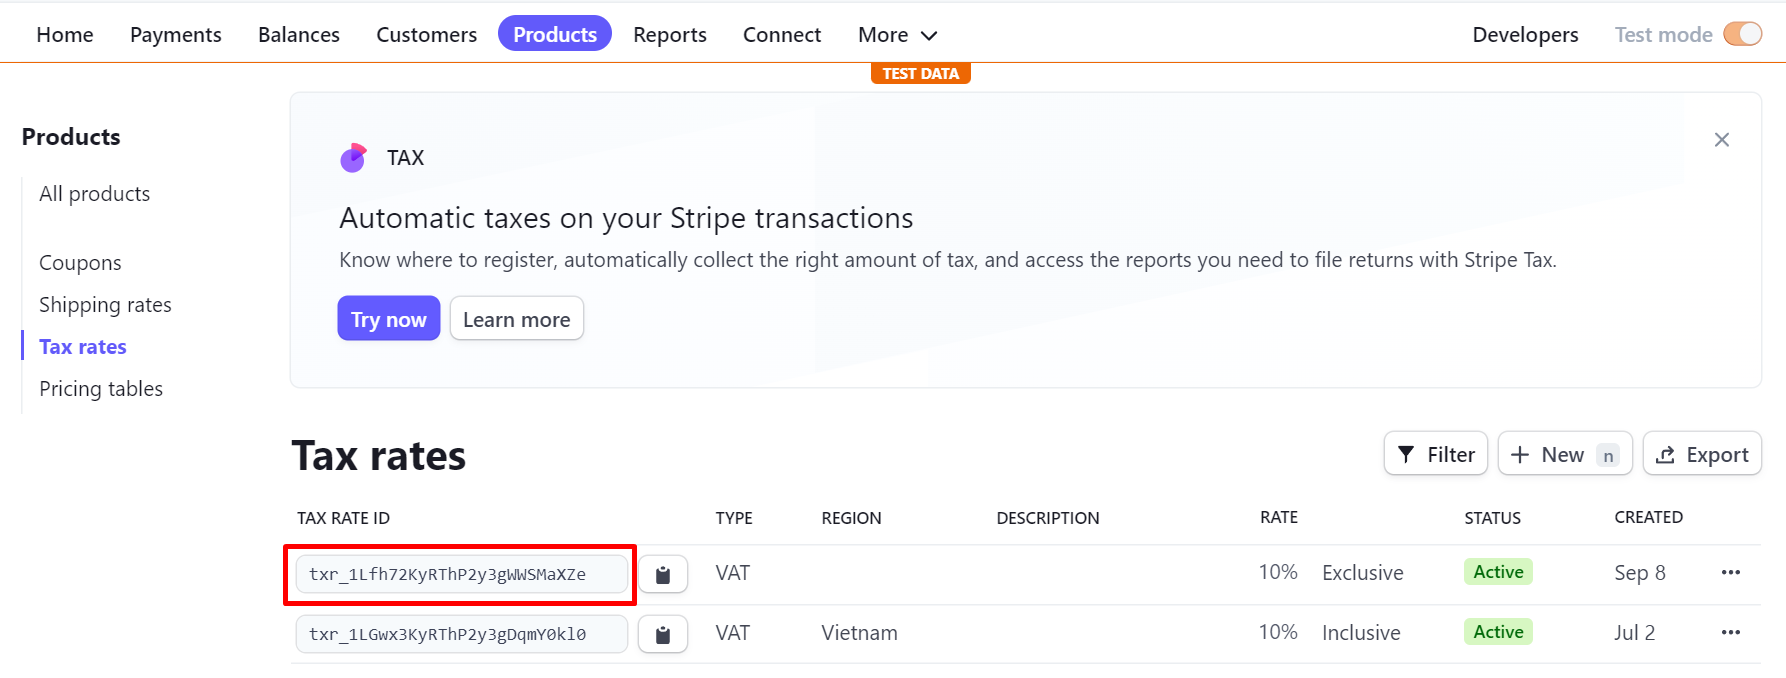
For more information: when enabling “Create Invoice”, a Tax ID box will appear.
It is the Tax Rate ID of Stripe Payment which is customized in the ratio percent.
Please go to Stripe Dashboard >Products > Tax Rates > Create a new one and embed the Tax rate ID to the “Tax ID box”.

also check your spam folder.
