

We integrated PAFE with Sendfox by API port method. You can synchronize your customer’s information for maximizing the effectiveness of your marketing campaigns.
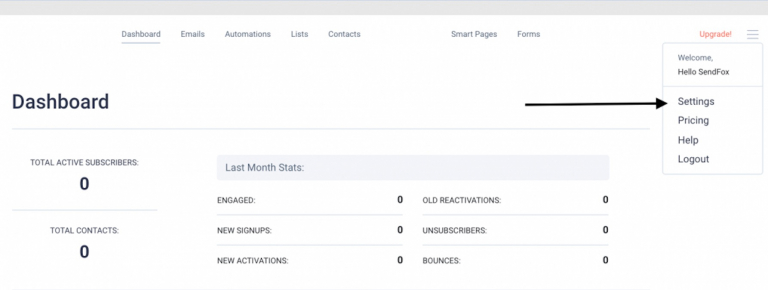
Step 1: Login to your Sendfox account and go to Settings
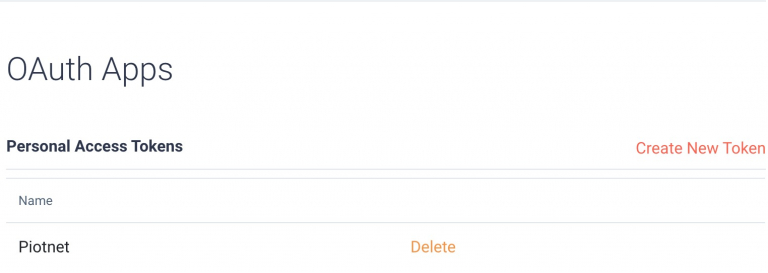
Step 2: Now go to API > Create new Token under Personal Access Token
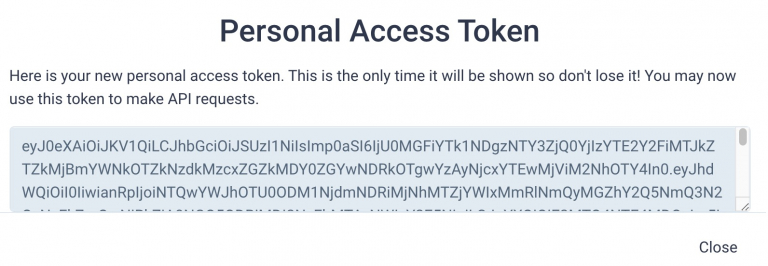
Step 3: Now copy the Personal Access Token. Make sure you copy the entire Personal Access Token
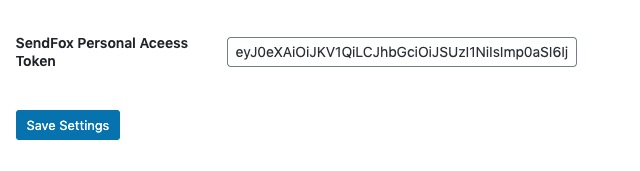
Step 4: Please go to Dashboard > Piotnet Addons > Settings > Integration > Sendfox Integration> Enter Personal Access Token > Save Settings
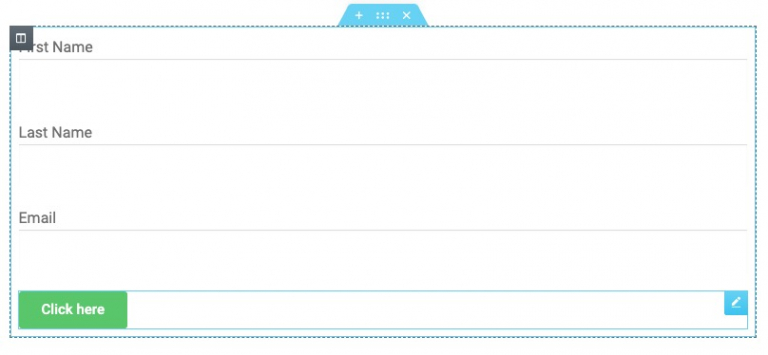
Step 5: Create a form with the necessary information on the admin page.
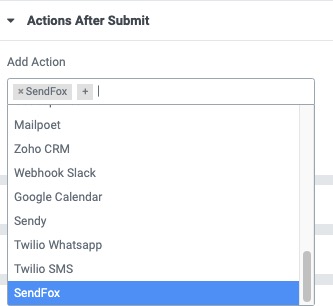
Step 6: Click Submit button, select Action After Submit -> Add Action -> Sendfox
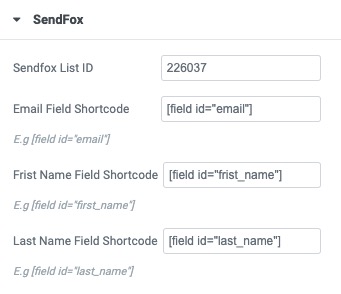
Step 7: Now copy the List ID from the URL you see above, like for us it is 226037
Step 8: Please enter List ID, Email Field, First Name Field, Last Name Field

also check your spam folder.
