
Razorpay stands as the exclusive payment solution in India, offering businesses the capability to accept, process, and distribute payments through its comprehensive product suite. With its integrated features, it grants access to a wide array of payment modes, encompassing credit cards, debit cards, net banking, UPI, and well-known digital wallets such as JioMoney, Mobikwik, Airtel Money, FreeCharge, Ola Money, and PayZapp.
In response to the demands of a broad user base, we have seamlessly incorporated Razorpay into Piotnet.
Please follow the steps below:
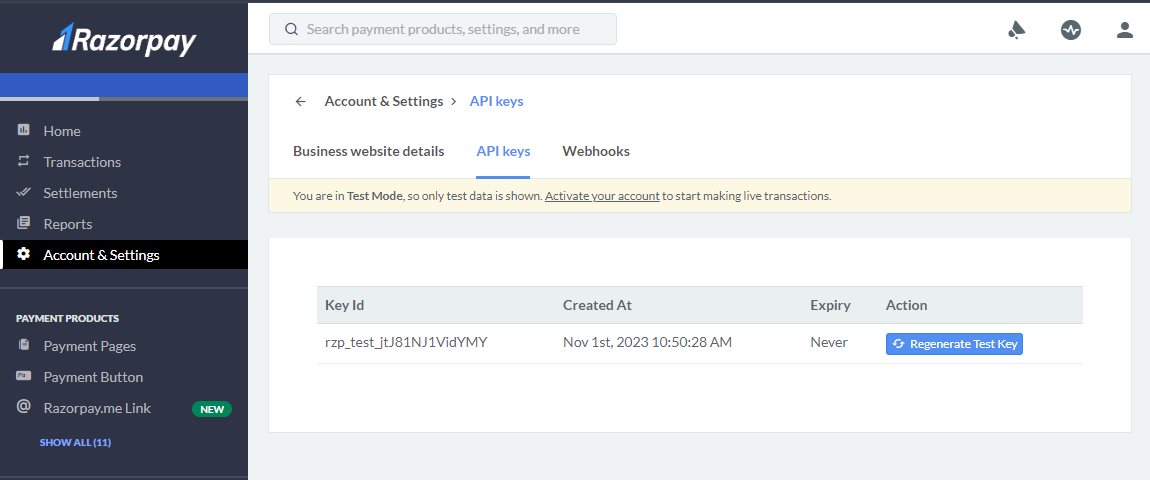
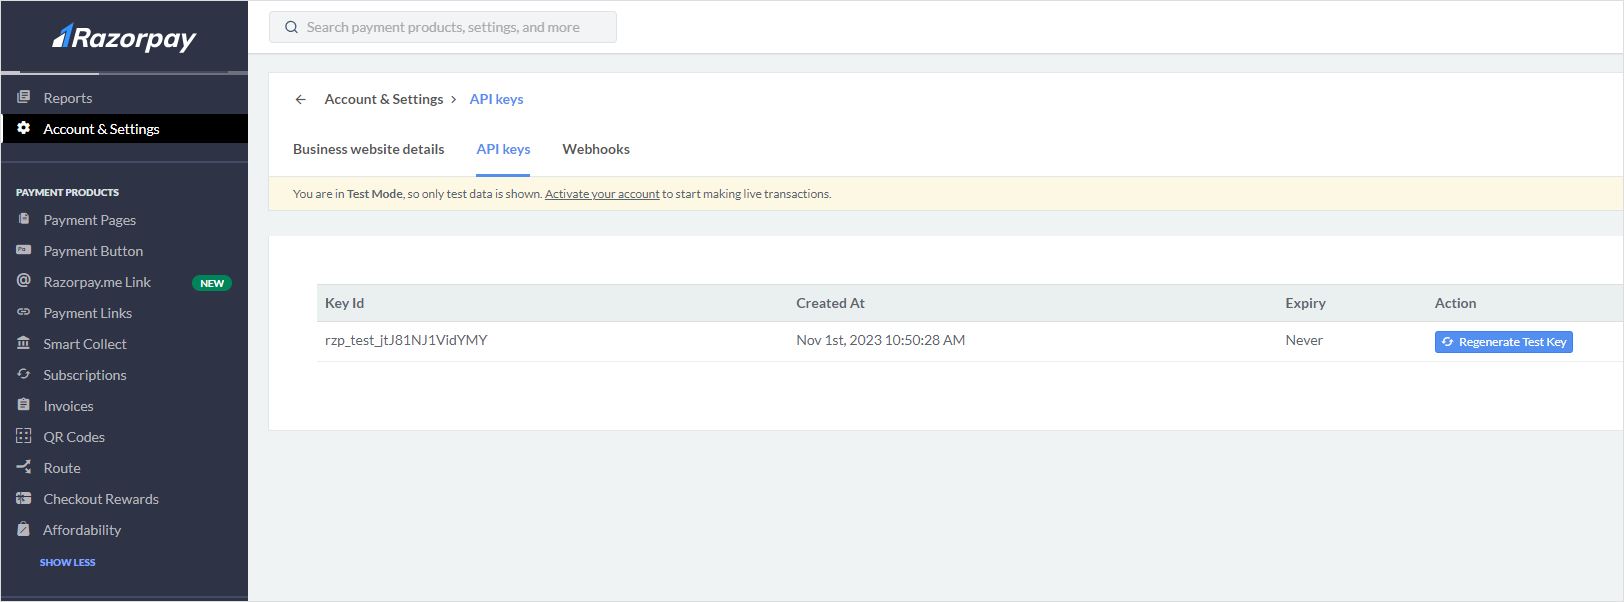
Step 1: Access razorpay.com and login your account.
Go to dashboard.razorpay.com and click on “ Account & Settings” => Website and App Settings => API keys => Get your own Key ID and Key Secret
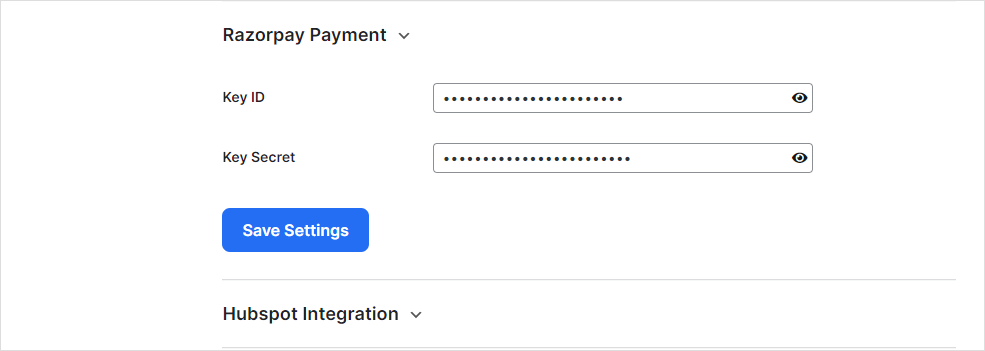
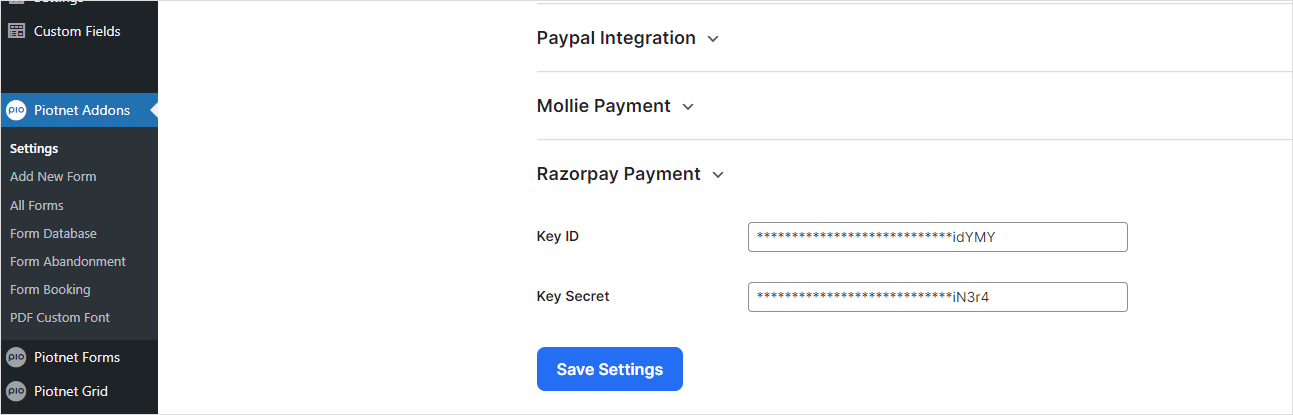
Step 2: Access Piotnet Settings by this path: Dashboard => Piotnet Addons => Settings => Integration => Razorpay Payment.
Then fill out the Key ID and Key Secret that you’ve just embedded.
=> Save Settings.
Step 3: Create your own form.
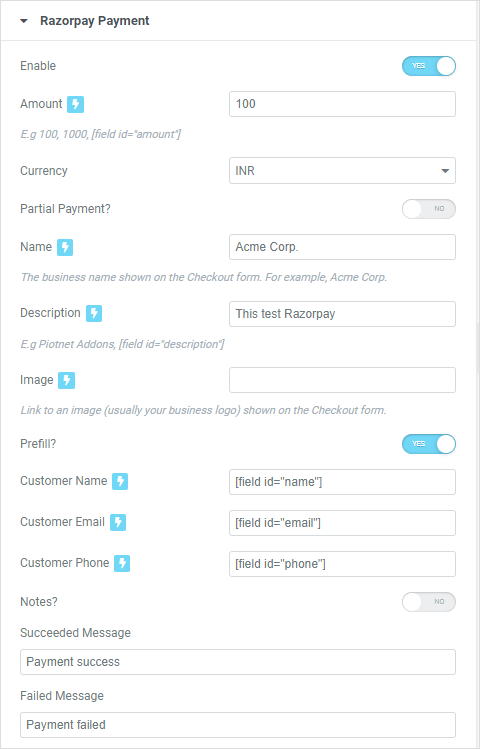
In Action after submit > enable Razorpay.
Then configure for necessary parameter controls.
Step 4: Save all the settings and process to test your form.
Razorpay Subscriptions provides you with the freedom to customize subscription plans according to your business needs. You can incorporate features such as trial periods, upfront charges, add-ons, discounts, and more. Easily set up recurring payments to manage billing cycles, and receive real-time alerts for subscription activities.
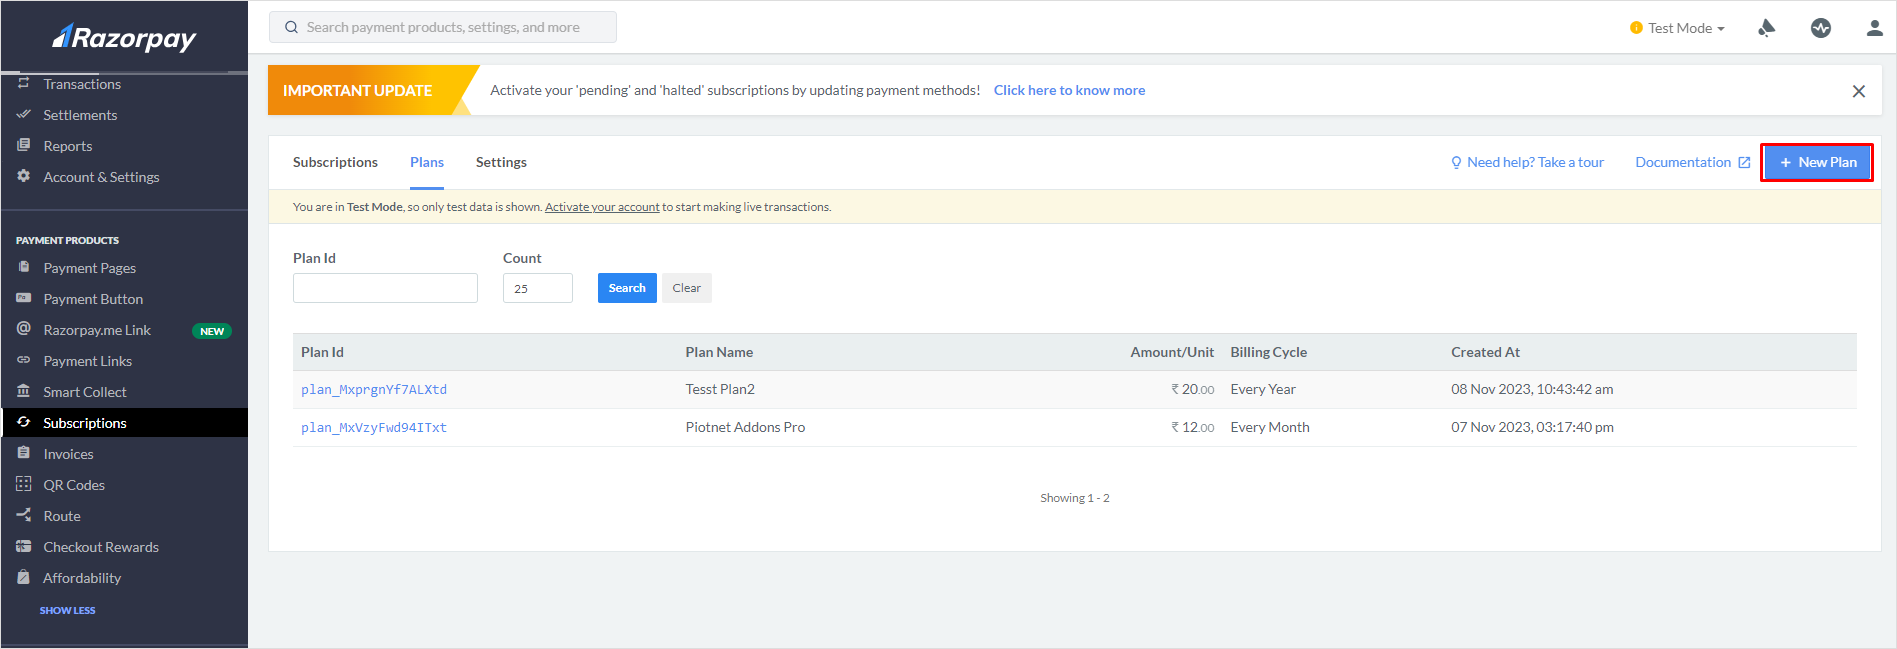
Step 1: Access dashboard.razorpay.com and login your account.
Step 2: Access PAYMENT PRODUCTS -> SUBSCRIPTIONS -> PLANS. Create a new plan.
Step 3:
Go to Account & Settings -> API.
Get the Key ID and Key Secret.
Click on Account and Settings by this path: Dashboard => Piotnet Addons => Settings => Integration => Razorpay Payment.
Then fill out the Key ID and Key Secret that you’ve just embedded.
=> Save Settings.
Step 4: Create a new form and the necessary information.
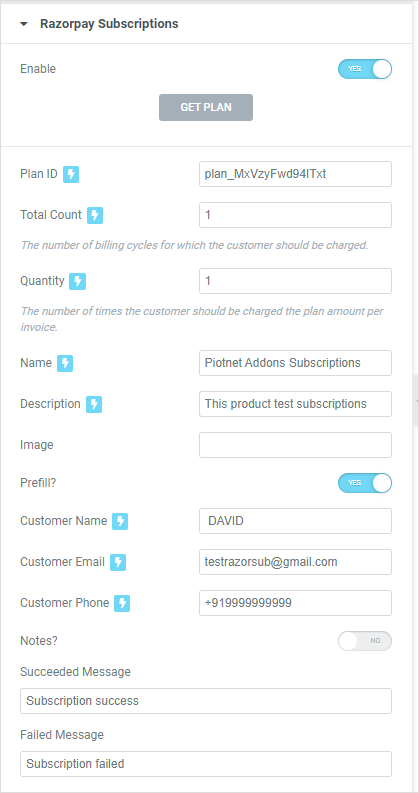
Step 5: In Section Razorpay Subscriptions: choose “Enable” and process to configure parameter data
– GET PLAN (button): Click button GET PLAN to query IDs of your plan.
– Plan ID: Choose your appropriate ID and embed it to the PLAN ID box.
– Total Count: The number of billing cycles for which the customer should be charged.
– Quantity: The number of times the customer should be charged the plan amount per invoice.
– Name: The business name shown on the Checkout form. For example, Acme Corp.
– Description: Description of the purchase item shown on the Checkout form.
– Image: Link to an image (usually your business logo) shown on the Checkout form.
– Prefill: You can prefill the following details at Checkout:
• Customer Name: Your customer name.
• Customer Email: Your customer email.
• Customer Contact: Your customer phone.
– Notes: Set of key-value pairs that can be used to store additional information about the payment.
– Succeeded Message: A successful notification
– Failed Message: Fail notification

also check your spam folder.
