Tutorials
Step 1: Get access from Google.
1.1 – Create API key:
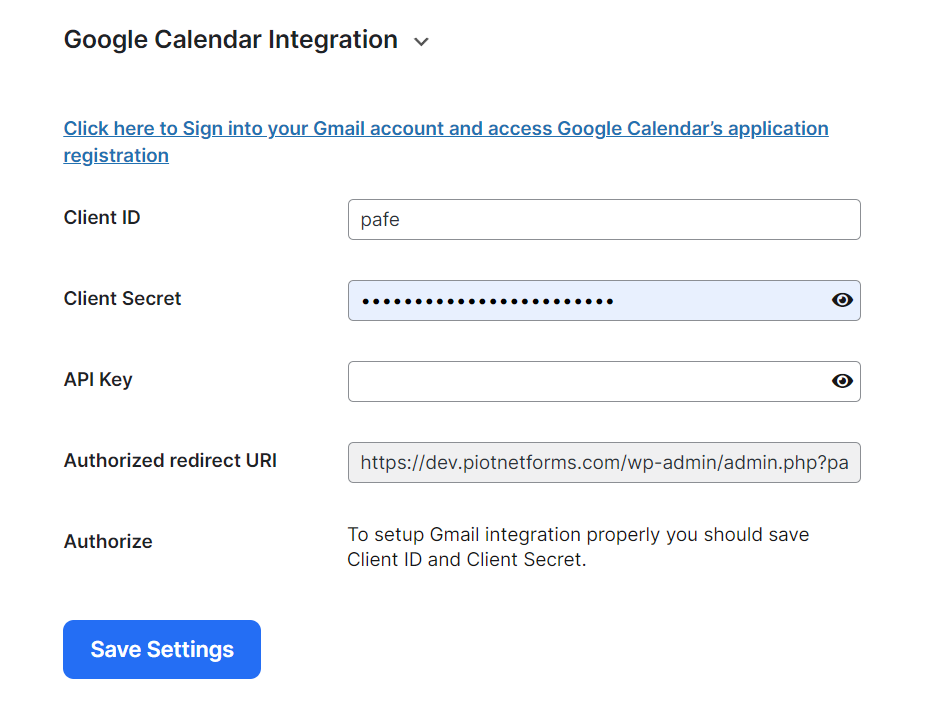
– Piotnet Addons > Settings > Integration > Google Calendar Integration> Click to “Click here to sign into your Gmail account and access Google Calendar’s application registration”

(Click the image to zoom)
– Enable APIS and Services: Click to “Enable APIS and Services” which you can see in the below image. Then choose the Google Calendar API and enable it.
(Click the image to zoom)
(Click the image to zoom)
– Next, You have to create the API key in Credentials.
(Click the image to zoom)
– Click to Restrict Key
(Click the image to zoom)
– Choose to Restrict key > Google Calendar API.
Then save it. You will have an “API key”
(Click the image to zoom)
1.2 – Create Client ID and Client Secret:
– Click “Create OAuth client ID”
(Click the image to zoom)
– Choose to the Web application. Then enter Authorized JavaScript origins ( your domain ) and Authorized redirect URIs (you can get it in PAFE > Settings > Integration > Google Calendar Integration ).
(Click the image to zoom)
– Click to “Create” and you will have the Client Secret and Client ID:
(Click the image to zoom)
1.3 Get the access from your website:
– Get back to the PAFE settings page and enter all the information above to the setting of Google Calendar Integration
(Click the image to zoom)
– After entering all the information. Click on “Authorization”. And choose your account:
– Click on Advanced
– Click on Go to *your website*
(Click the image to zoom)
Step 2: Create the Form with PAFE Form Builder:
– You can create a form with same as the image in the below:
(Click the image to zoom)
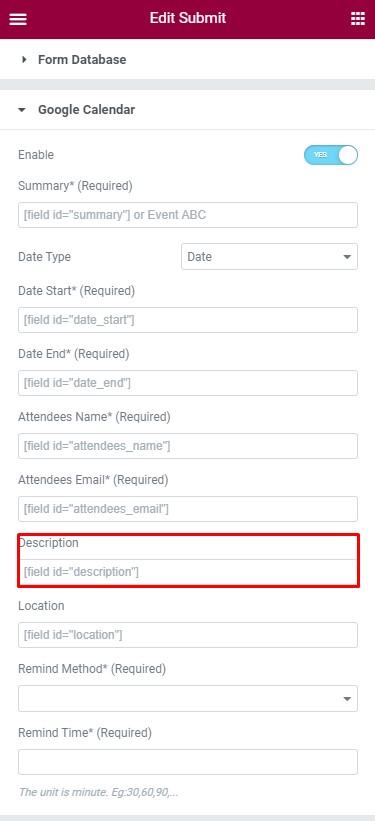
– Choose “Google Calendar” in Action After Submit option
Fill out all field shortcodes that you set up in the form above. Same the image in the below:
Send data from Booking Form to Google Calendar
Step 1: Create the Booking Form
Follow this document: https://pafe.piotnet.com/docs/booking-form-2/


